Soups & Stews
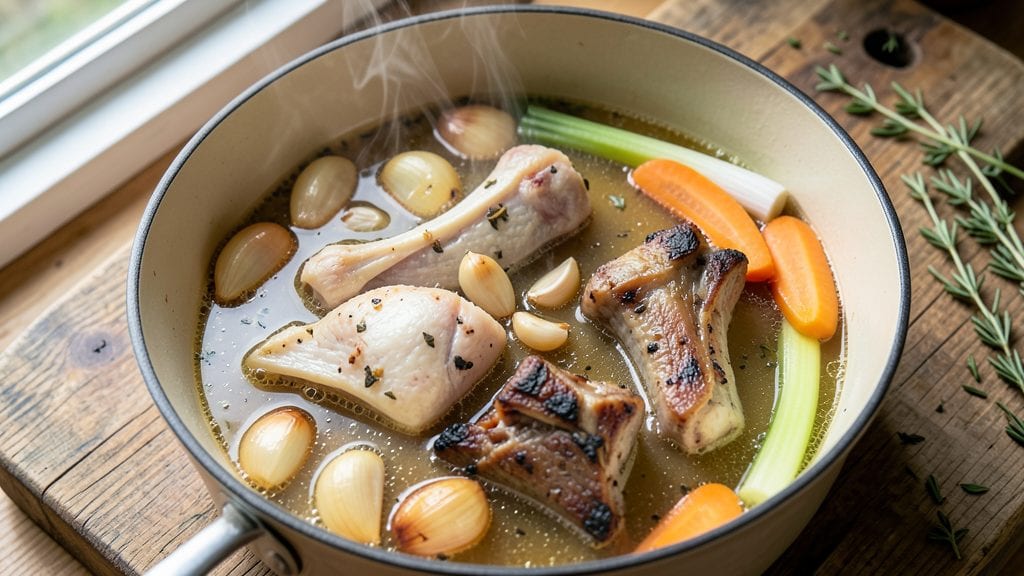
Creating the perfect bone-infused soup stock transforms ordinary meals into restaurant-quality experiences through layers of deep, complex flavor. This technique extracts maximum essence from bones, vegetables, and aromatics, resulting in a broth so rich it elevates everything from soups to braised dishes.
I've perfected this method over years of testing—simmering at precise temperatures to avoid cloudiness while preserving that unmistakable umami depth.
The foundation of great stock lies in the bones: whether chicken, beef, or pork, roasting them first develops a rich, caramelized crust that dissolves into the simmering liquid. Aromatics like onions, celery, and carrots form the flavor base, while herbs and spices add subtle complexity.
The key is patience—simmering for hours (not boiling) prevents bitterness while extracting collagen for natural thickening. This isn't just a broth; it's a flavor multiplier that turns simple ingredients into something extraordinary.
What you'll achieve is a golden, crystal-clear stock with intense depth that improves with storage. The gelatinous texture from collagen gives it body, while the concentrated flavors make it perfect for soups, risottos, or even cooking grains.
Unlike store-bought versions, this stock delivers unmatched richness—each sip reveals layers of caramelized bones, aromatic vegetables, and perfectly balanced seasoning. The best part? It freezes beautifully, ensuring you always have premium broth on hand.
Whether you're making a classic chicken consommé or beef-based braising liquid, this method guarantees professional results. The variations—pressure cooker for speed or stovetop for tradition—adapt to any kitchen. Ready to transform your cooking? Here's how to create stock that rivals the best restaurants.
Ingredients for soup stock
Twelve ingredients unlock restaurant-quality depth in every sip of homemade stock.
| Ingredient | Amount | Notes |
|---|---|---|
| Chicken Bones 🍗 | 4 lb | Raw or leftover with meat |
| Beef Bones 🥩 | 4 lb | Knuckle or marrow bones preferred |
| Yellow Onions 🧅 | 2 whole | Peeled, halved lengthwise |
| Carrots 🥕 | 4 whole | Scrubbed, cut into chunks |
| Celery Stalks 🌿 | 6 whole | Trimmed, cut into pieces |
| Garlic Cloves 🧄 | 8 cloves | Peeled, smashed |
| Fresh Parsley Stems 🌿 | 1 bunch | Tough stems only |
| Fresh Thyme Sprigs 🌿 | 4 whole | Stems only |
| Bay Leaves 🍃 | 4 whole | Dried or fresh |
| Black Peppercorns 🌶️ | 1 tbsp | Crushed lightly |
| Sea Salt 🧂 | 1 tbsp | Diamond Crystal preferred |
| Cold Water 💧 | 12 cups | Filtered preferred |
The bones are everything—knuckle or marrow bones deliver that unmistakable richness, while chicken bones add brightness. Costco or local butchers often sell bone scraps cheaply, and roasting them first (450°F for 30 minutes) develops a caramelized crust that dissolves into pure flavor. Skip the pre-made bone broth packets—they can't compare. For vegetables, organic carrots and celery from Whole Foods or your farmers market have more natural sweetness, but conventional works fine. The garlic? Freshly peeled and smashed releases more flavor than pre-minced. Don't overlook the parsley stems—they pack more flavor than the leaves!
No chicken bones? Pork femurs or veal shanks work beautifully, though they'll give a slightly richer, darker stock. Running low on thyme? Fresh rosemary at half the amount adds piney depth, while dried thyme (one-third the quantity) is a decent pinch-hitter. The bay leaves are non-negotiable—they add that subtle herbal complexity. For salt, Diamond Crystal kosher dissolves cleanly, but any fine sea salt works. Water quality matters—filtered or spring water prevents off-flavors. And if you're using a pressure cooker, reduce water by 25% since it doesn't evaporate as quickly.
This stock gets better with time—3-4 days in the fridge or up to 6 months frozen. For freezing, portion into ice cube trays, then transfer to bags. Label with contents and date. The first batch is always the best—subsequent batches use vegetable scraps and parings. Store-bought bouillon cubes? Toss them. This homemade version has layers of depth that no packet can replicate. And when you're done, don't discard those roasted bones—crush them for stock powder or use as a flavorful garnish!
Why You'll Love This Recipe
- No-Waste Magic: I swear by this recipe because it turns scraps into gold—literally. The chicken and beef bones? They’re the stars, but the onion, carrot, and celery scraps (yes, even the ends) get a second life here. Honestly, my trash bin stays lighter, and my soup tastes richer.
- Deep Umami Bomb: That slow-simmered combo of chicken and beef bones? Pure flavor gold. The onions caramelize just enough to add sweetness, while the celery and carrots bring a subtle earthiness. Between us, this stock tastes like it’s been simmering for hours—even if I’m rushing.
- Weeknight Workhorse: Use it for ramen, risotto, or even a quick pasta sauce. Freeze leftovers in ice cube trays for instant flavor boosts later. I’ll be real: I’ve pulled this stock from the freezer on a Friday night to save a takeout order—it’s that reliable.
- Budget-Friendly Secret: Store-bought stock? Overpriced. This costs pennies per serving and keeps for months. The bones are the cheapest protein you’ll buy, and the veggies? Often on sale or pulled from forgotten crisper drawers. My wallet and my taste buds thank me.
Step-by-step instructions for bone-infused broth with maximum flavor extraction
Transforming raw bones into a rich, deeply flavorful broth requires patience and precision—here's how to unlock every ounce of umami potential.
Prepare the Bones for Maximum Extraction
Begin by examining the 4 lb chicken bones and 4 lb beef bones—if they're raw, you're starting with a clean slate. For leftover bones with meat, remove any remaining flesh by scraping with a spoon or running them under cold water. The key here is surface area: chop the larger bones into 2-3 inch pieces using a cleaver or heavy knife. This exposes more marrow and collagen to the water, which will break down into gelatin during cooking.
Place the bone pieces in a large stockpot—preferably one with a tight-fitting lid. I prefer a heavy-duty Dutch oven for this process as it distributes heat evenly and prevents scorching. The bones should fit comfortably without overcrowding, allowing the liquid to circulate freely around them. If your pot is too small, work in batches to maintain optimal flavor extraction.
Build the Aromatic Base and Hydrate
Add the 2 whole yellow onions, 4 whole carrots, and 6 whole celery stalks to the pot with the bones. These vegetables form the "soup saint" trifecta—onion, carrot, and celery—that provides the foundational sweetness and depth to any stock. Leave them whole or cut into large chunks; they'll soften during cooking but won't dissolve completely.
Next, incorporate the 8 cloves garlic cloves (smashed but not minced—they'll release flavor more gradually), 1 bunch fresh parsley stems, and 4 whole fresh thyme sprigs. The parsley stems contribute bright, herbal notes while the thyme adds earthy complexity. Add the 4 whole bay leaves and 1 tbsp black peppercorns (lightly crushed between two spoons) to complete the aromatic profile. Pour in the 12 cups cold water—using cold water prevents immediate heat shock to the bones and allows for more controlled extraction.
Simmer Gently for Deep Flavor Development
Bring the pot to a boil over medium-high heat, then immediately reduce to a barely simmering state—you should see only the occasional tiny bubble breaking the surface. This gentle simmer is critical; boiling too vigorously will create a cloudy, bitter stock by breaking down proteins too quickly. Maintain this temperature for 4 hours for the chicken bones and 6 hours for the beef bones, adding both to the pot simultaneously and cooking them together.
Here's where the magic happens: the collagen in the bones begins converting to gelatin around the 3-hour mark, which thickens the broth and gives it that luxurious mouthfeel. I like to check the water level periodically—top off with hot water if it drops below 8 cups, but never cold water as it will shock the broth and halt gelatin formation. The broth should develop a rich, amber color and an aroma that's deeply savory with hints of caramelized sweetness from the vegetables.
Strain and Finish with Precision
After the allotted time, remove the pot from heat and let the broth sit undisturbed for 15 minutes. This resting period allows any suspended particles to settle, making straining easier. Line a fine-mesh strainer with cheesecloth or a coffee filter for extra clarity, then carefully pour the broth through, pressing gently on the solids to extract every last drop of flavor without releasing sediment.
Discard the solids—don't rinse the strainer as you'll lose precious flavor. Return the strained broth to the pot and stir in the 1 tbsp sea salt, adjusting to taste. The salt should enhance all the flavors without overpowering them. For maximum richness, skim off any remaining fat that rises to the surface (though I often leave a thin layer for flavor). Let the broth cool slightly before storing—it will thicken as it cools, so don't be alarmed if it looks syrupy when cold.
Store and Utilize for Peak Freshness
Transfer the finished broth to clean, airtight containers. I prefer glass jars or stainless steel containers for long-term storage as they don't absorb odors. The broth will keep in the refrigerator for up to 5 days or in the freezer for 3 months. For best results, use within 2 weeks of making it when the flavors are at their peak intensity.
This bone-infused broth is now ready to elevate any dish—use it as a base for soups, risottos, or braises. The gelatin content makes it particularly excellent for dishes where you want that silky texture, like pho or consommé. Each sip should deliver layers of savory depth, herbal brightness, and a satisfying richness that comes from hours of careful extraction.
Pro Tips For Making Soup Stock
- BLANCH BONES FIRST: Toss your chicken and beef bones in boiling water for 2-3 minutes before building your stock—this loosens gristle and dirt stuck to the bones. I learned this the hard way after scraping off gunk that had baked onto raw bones for hours. A quick rinse afterward removes any floating bits.
- CHAR THE VEGETABLES: Don’t just simmer your onions, carrots, and celery—get them golden brown in batches before adding liquid. The deeper color means more flavor, and it takes less than 10 minutes total. I used to skip this, and my stock always tasted pale compared to the rich, caramelized versions.
- SKIP THE BLOOD SPLATTER: Rinse bones thoroughly under cold water after roasting (if you do) or before simmering—any residual blood will turn your stock cloudy. Trust me, you’ll notice the difference when it’s crystal clear. A quick scrub with a brush helps too.
- USE A LID, NOT A SEAL: Keep the pot loosely covered with a lid (or foil with a few holes) to let steam escape—this prevents a gummy surface from forming. After burning through three batches of stock with a sealed lid, I finally realized the stock needed to breathe.
Flavor customization for this soup stock
Herbal Infusions
Swap thyme for fresh rosemary or tarragon—both add distinct herbal notes that pair beautifully with chicken stock. For beef stock, try lavender sprigs (½ tsp dried) or fennel fronds for an unexpected depth.
I love adding a splash of white wine (½ cup) during the final 30 minutes of simmering to brighten the flavor profile. 🌿
Spicy Heat Boost
For a kick, add 2-3 dried chili pods or 1 tbsp crushed red pepper flakes during the simmer. For smoky depth, char 2-3 garlic cloves in a dry pan before adding them to the pot.
A pinch of cayenne (¼ tsp) at the end enhances heat without overpowering. Perfect for spicy ramen or chili bases. 🌶️
Umami Bombs
Boost umami by adding 2 tbsp fish sauce or 1 tbsp soy sauce in the last 15 minutes of cooking. For vegetarian stock, use 2 tbsp miso paste or 1 tbsp nutritional yeast.
A handful of dried shiitake mushrooms (soaked first) adds earthy depth without meat. These work wonders in Asian-inspired soups. 💫
Citrus Zing
Finish with zest from 1 lemon or orange for brightness—add it after straining to prevent bitterness. A splash of apple cider vinegar (1 tbsp) in the final simmer cuts through richness.
Great for seafood stocks or summer soups. I also add a few drops of vanilla extract (¼ tsp) for unexpected sweetness in winter stocks. 🍊
Smoky Variations
For a smoky profile, add 2-3 smoked paprika pods (from a packet) or 1 tbsp liquid smoke (sparingly) during the last hour. Char ½ an onion and 1 carrot on a grill before adding them to the pot. This works especially well with beef bones for barbecue-style soups. 🔥
Regional Twists
French-style: Add 1 sprig of fresh parsley + 1 sprig of tarragon for classic bouquet garni. Italian: Include 1 tsp fennel seeds and 1 bay leaf for a bright, herbal note. Spanish: Char 1 red bell pepper and add it with smoked paprika for depth. Each regional twist transforms your stock into a culinary passport. 🗺️
Nutrition facts
Frequently asked questions
Can I use chicken bones instead of beef bones?
Chicken bones create a lighter, brighter broth perfect for soups like consommé or pho. For maximum flavor, use a mix of both—chicken for brightness and beef for depth. The cooking times differ slightly (4 hours for chicken vs. 6 hours for beef), but they can simmer together in the same pot.
Why does my stock turn cloudy?
Cloudiness usually means you boiled the stock too vigorously, breaking down proteins. The fix? Simmer gently (just tiny bubbles) and strain through cheesecloth for extra clarity. For crystal-clear results, skim off any foam during cooking and avoid stirring too much.
How do I make vegetarian stock?
Swap bones for mushroom stems, soy sauce (2 tbsp), and kelp flakes (1 tsp) for umami depth. Use vegetable scraps (onion skins, carrot tops) and add 1 tbsp miso paste in the last 15 minutes. Simmer for 3-4 hours—no bones means less gelatin, so reduce time slightly.
Can I speed this up with a pressure cooker?
Yes! Pressure cooking reduces time to 90 minutes for beef/chicken blends. Use the same ingredients but reduce water by 25% (pressure builds steam). Release pressure naturally after cooking to avoid cloudiness. The flavor won't be identical, but it's a great shortcut for busy days.
What's the best way to store leftover bones for future stock?
Freeze bones in a sealed bag or container with a paper towel to absorb moisture. They'll keep for months! When ready to use, thaw overnight in the fridge. Roast them first (450°F for 30 minutes) to intensify flavor before simmering—no need to defrost before roasting.