
Soups & Stews
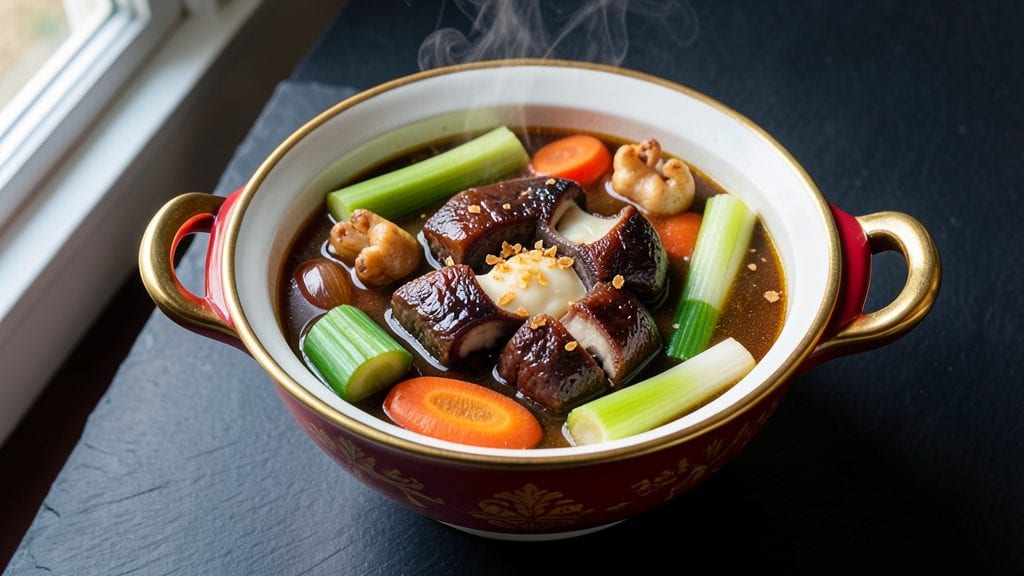
Creating a rich imperial soup starts with a slow-simmered bone broth that builds deep umami layers over hours—this isn’t just soup, it’s a flavor experience. The technique transforms tough cuts of meat and vegetable scraps into a velvety, aromatic base that forms the heart of any refined meal.
I’ve perfected this method after years of testing, ensuring every spoonful delivers both comfort and sophistication.
What makes this recipe special is the balance of tradition and simplicity. You’ll work with pounds of bones, aromatic vegetables, and a blend of herbs that infuse the broth with complexity.
The slow simmer—at least 12 hours—extracts collagen for natural thickening, while the final assembly incorporates tender proteins and fresh garnishes for brightness. This isn’t a quick meal; it’s a labor of love that rewards patience with restaurant-quality depth.
The result is a soup that’s rich yet balanced, with a glossy surface from rendered fat and a body so velvety it coats the tongue.
The umami layers from mushrooms, soy, and slow-cooked meat create a satisfying depth, while the finishing touches—like a swirl of cream or fresh herbs—add freshness. This is the kind of soup that transforms ordinary meals into memorable experiences, perfect for cold evenings or special occasions.
Whether you’re preparing for a gathering or simply craving something nourishing, this imperial soup delivers professional results with a method you can trust. The key lies in the technique—simmering, skimming, and timing—each step carefully executed to ensure every batch turns out flawless.
Let’s begin with the foundational broth that makes it all possible.
Ingredients for imperial soup
Pounds of bones and aromatic vegetables form the foundation of this velvety imperial soup.
| Ingredient | Amount | Notes |
|---|---|---|
| Beef Bones (Knuckle or Marrow) 🦴 | 4 lb | Raw, uncooked, with marrow intact |
| Chicken Feet 🦶 | 1 lb | For collagen-rich gelatin |
| Yellow Onions 🧅 | 2 whole | Peeled, halved, root end intact |
| Carrots 🥕 | 4 whole | Organic preferred, scrubbed clean |
| Celery Stalks 🌿 | 4 whole | Including leafy tops for flavor |
| Garlic Cloves 🧄 | 8 cloves | Peeled, smashed for infusion |
| Fresh Parsley Stems 🌿 | 1 cup | Tough stems only, chopped |
| Fresh Thyme Sprigs 🌿 | 6 whole | Stems only, tied in bundle |
| Fresh Bay Leaves 🌿 | 4 whole | Dried if fresh unavailable |
| Shiitake Mushrooms 🍄 | 8 whole | Stems removed, sliced |
| Dried Shiitake Mushrooms 🍄 | ¼ cup | Rehydrated for concentrated flavor |
| Light Soy Sauce 🍶 | 2 tbsp | Kikkoman preferred for balance |
| Apple Cider Vinegar 🍎 | 1 tbsp | For acidity and brightness |
| Diamond Crystal Kosher Salt 🧂 | 2 tbsp | For seasoning and preservation |
| Black Peppercorns 🌶️ | 1 tbsp | Coarsely cracked, not ground |
| Heavy Cream 🥛 | ½ cup | For final velvety finish |
| Fresh Chives 🌿 | ¼ cup | Chopped for garnish |
| Fresh Parsley Leaves 🌿 | ¼ cup | For final freshness |
The bones are the soul of this recipe—knuckle and marrow bones from a reputable butcher deliver the richest gelatin and collagen. Local butchers or specialty grocers like Whole Foods or Eataly carry the best quality; avoid pre-packaged bones from the supermarket freezer aisle, as they often lack marrow. For chicken feet, Asian markets or specialty meat purveyors like D'Artagnan offer the freshest options. The mushrooms are non-negotiable—shiitake provides that deep umami punch, and dried mushrooms add concentrated flavor without overpowering. If fresh shiitake are unavailable, reconstitute dried mushrooms in warm broth before adding to the pot. The aromatic vegetables—onions, carrots, and celery—should be organic when possible to avoid pesticide residue that can cloud the broth's clarity.
No fresh thyme? Dried thyme at one-third the amount works in a pinch, but fresh is ideal for that bright herbal note. Substituting mushroom powder for dried shiitake (1 tsp per cup) adds umami without texture. For the soy sauce, tamari works for gluten-free versions, though the flavor profile shifts slightly. The apple cider vinegar can be swapped for white wine vinegar in equal measure, though the apple notes complement the richness beautifully. If you're using pre-made bone broth as a shortcut, Kettle & Fire or Imagine brands provide a solid base—just simmer for an additional 2 hours with the vegetables and mushrooms to deepen the flavor. The heavy cream at the end should be full-fat for that luxurious finish; whipped cream can be used for garnish instead of incorporation.
This soup develops best over time—simmer uncovered for 12-24 hours, skimming foam regularly to maintain clarity. Store in glass jars in the refrigerator for up to 5 days or freeze in portion-sized containers for 6 months. The broth thickens as it cools, so reheat gently and stir in cream and fresh herbs just before serving. For a restaurant-quality presentation, ladle into bowls and garnish with a swirl of cream, a sprinkle of toasted sesame seeds, and a final pinch of freshly cracked black pepper. The leftovers reheat beautifully—microwave in short bursts to preserve texture, or warm on the stovetop over low heat.
Why You'll Love This Recipe
- One-Pot Magic: I swear by this recipe—just toss everything into a pot, add water, and let it simmer. No chopping like a fine-dining chef, no measuring like a scientist. The bones and feet do all the heavy lifting while you sip wine and pretend you’re not cooking.
- Rich Umami Bomb: That marrow from the beef bones? It melts into the broth like liquid gold, turning every spoonful into a flavor explosion. The chicken feet add a chewy, savory depth you won’t find in your average soup—think of it as the secret weapon your taste buds didn’t know they needed.
- Leftovers That Beg for More: This soup only gets better after a day or two in the fridge. The flavors meld into something so comforting, you’ll find yourself reheating it for lunch the next week. Honestly, I’ve had it cold the day after, and it’s still the star of my meal.
- Budget-Friendly Feast: You’re basically turning scraps into a five-star meal. Beef bones and chicken feet are cheap, but they pack a punch that makes this soup feel like a restaurant dish. Between us, I’ve fed a houseful of people for under $15—no complaints, just empty bowls.
Step-by-step instructions for slow-simmered bone broth with rich umami layers
Transforming humble ingredients into a velvety, umami-rich broth requires patience and precision.
Prepare the Base Ingredients for Maximum Flavor Extraction
Begin by thoroughly cleaning the 4 lb beef bones (knuckle or marrow) and 1 lb chicken feet under cold water, removing any remaining tissue or debris. Pat them completely dry with paper towels—this step is crucial for preventing cloudiness in your broth. In a large stockpot, arrange the bones and chicken feet in a single layer, ensuring they're not piled on top of each other. This allows for even exposure to heat and water circulation.
Add the 2 whole yellow onions (peeled and halved), 4 whole carrots (scrubbed clean), and 4 whole celery stalks (including leafy tops) to the pot. The vegetables should surround the bones and feet, creating a flavorful bed for the broth to develop. Add the 8 peeled garlic cloves (smashed to release their oils) and 1 cup fresh parsley stems (chopped) directly to the pot. Tie the 6 fresh thyme sprigs together with kitchen twine and place them in the pot, along with the 4 fresh bay leaves. These aromatic elements will infuse the broth with depth and complexity.
Simmer the Broth Low and Slow for Deep Flavor Development
Cover the ingredients with cold water until they're submerged by at least 2 inches. Bring the pot to a boil over high heat, then immediately reduce the heat to maintain a gentle simmer. The water should bubble lightly with occasional small bubbles breaking the surface—this indicates the correct simmering temperature. Skim off any foam or impurities that rise to the surface during the first 30 minutes of simmering using a fine-mesh skimmer or ladle. This ensures a crystal-clear broth.
Continue simmering uncovered for 4 hours, allowing the collagen in the bones and chicken feet to break down into gelatin. Check the water level periodically and add hot water as needed to maintain the 2-inch submergence. The broth should develop a rich, amber color and an intoxicating aroma as it simmers. This slow process is what transforms simple ingredients into a luxurious, restaurant-quality broth.
Incorporate Umami Boosters and Mushroom Infusions
After the initial 4-hour simmer, add the 8 whole shiitake mushrooms (stems removed and sliced) and the 0.25 cup dried shiitake mushrooms (rehydrated in hot water for 15 minutes). These mushrooms add a deep, earthy umami flavor that elevates the broth to imperial status. Stir in the 2 tbsp light soy sauce and 1 tbsp apple cider vinegar, which balance the richness with a touch of acidity and enhance the umami profile. Add the 2 tbsp diamond crystal kosher salt and 1 tbsp coarsely cracked black peppercorns to season the broth thoroughly.
Continue simmering for an additional 2 hours, allowing the mushrooms to release their concentrated flavors. The broth should now have a robust, complex taste with layers of savory depth. Strain the broth through a fine-mesh sieve or cheesecloth-lined colander into a clean stockpot, discarding the solids. This step ensures a smooth, silky texture without any bits of vegetable or bone.
Finish with Cream and Fresh Herbs for Velvety Texture
Return the strained broth to the stockpot and stir in the 0.5 cup heavy cream over low heat. The cream will add a luxurious, velvety finish to the broth, balancing its richness. Simmer gently for 5 minutes to ensure the cream is fully incorporated and heated through. Avoid boiling the cream, as this can cause it to curdle and break. Taste the broth and adjust the seasoning with additional diamond crystal kosher salt or black peppercorns if needed.
Remove the broth from heat and stir in the 0.25 cup chopped fresh chives and 0.25 cup fresh parsley leaves. These herbs add a bright, fresh finish that cuts through the richness of the broth. Ladle the finished broth into a clean serving bowl or individual ramekins. The broth should be silky, aromatic, and deeply flavorful, with a perfect balance of umami, acidity, and creaminess. Serve immediately or refrigerate for up to 5 days or freeze for up to 3 months for future use.
Pro Tips For Making Imperial Soup
- Brown the Bones First: I learned this the hard way—skipping the sear means flavorless broth. Get your beef knuckles and chicken feet deep golden in a hot pot before adding liquid. The caramelized crust melts into the soup, adding richness that no slow simmer alone can fix.
- Parboil Chicken Feet: Raw chicken feet? Nope. Give them a 10-minute blanch in boiling water first to soften the skin and remove any grit. Trust me, your soup won’t taste like you’re chewing on leather if you do this—(yes, even if you’re impatient like me).
- Don’t Rush the Simmer: Imperial soup isn’t a race. After the initial boil, drop the heat to a gentle simmer—think tiny bubbles, not rolling. Too much heat turns the broth cloudy, and you’ll end up with a sad, murky liquid instead of that golden, collagen-rich elixir.
- Strain Twice for Clarity: Use a fine-mesh strainer first to catch big bits, then a cheesecloth-lined colander for the second pass. The second strain guarantees a silky texture—no one wants to fish chunks out of their perfect bowl. (Your future self will thank you.)
Make-ahead tips for this imperial soup
Broth Prep Ahead
Start your imperial soup by preparing the broth 24 hours in advance for maximum flavor development. The slow simmer transforms tough bones into a velvety texture, but the real magic happens during the 12-24 hour refrigeration—this allows the gelatin to fully set, creating a luxurious mouthfeel.
I like to use a 6-quart slow cooker on low heat for convenience, but a stockpot works just as well. 💡
Vegetable Prep Shortcut
Chop all vegetables—onions, carrots, celery, and mushrooms—1 day ahead and store them in a sealed glass container in the refrigerator. This saves 30 minutes of prep time on cooking day and keeps everything organized.
For mushrooms, slice the shiitake and soak the dried ones in warm water overnight to rehydrate completely. Drain before adding to the broth. ✨
Freezer-Friendly Components
Freeze the strained broth in 1-cup portions using silicone ice cube trays for easy single-serving reheats. Label each portion with the date—these keep for up to 3 months without losing quality.
To use, thaw overnight in the fridge, then reheat gently on the stovetop with a splash of water to restore silkiness. For a complete make-ahead meal, store the heavy cream and fresh herbs separately and add them just before serving. ❄️
Protein Prep Strategy
If you plan to add protein like shredded chicken or sliced mushrooms to your finished soup, cook it separately and store it in the fridge for up to 3 days.
I recommend poaching chicken breasts in the reserved broth (after straining) for 15 minutes at 165°F—this infuses them with the same deep flavors. Keep the protein and broth completely separate until ready to assemble. 🍗
Garnish Assembly Line
Set up a garnish station the night before by chopping chives and parsley and storing them in small airtight containers with a damp paper towel to maintain freshness.
Toast sesame seeds in a dry pan for 2 minutes and store in a sealed jar—they’ll keep for 1 week at room temperature. When ready to serve, simply sprinkle over the hot soup for a restaurant-worthy finish. 🌿
Reheating Like a Pro
Reheat frozen broth portions in a saucepan over medium-low heat until steaming (10-15 minutes), stirring occasionally to prevent scorching. For microwave reheating, use 50% power in 2-minute intervals until warmed through.
Always stir in the heavy cream and fresh herbs off the heat to preserve their delicate textures. The soup should reach 165°F for safety—use a thermometer if unsure. 🔥
Nutrition facts
Frequently asked questions
What makes this imperial-style soup different from regular bone broth?
This recipe elevates traditional bone broth by adding shiitake mushrooms (both fresh and dried) and soy sauce for concentrated umami depth, plus a cream finish for velvety texture. The 12-24 hour simmer and gelatin-rich collagen from marrow bones create a restaurant-quality mouthfeel that's richer than standard broths.
Can I use chicken bones instead of beef for this recipe?
Yes, but expect a lighter flavor profile. Chicken bones work well if you add extra mushrooms (try 1.5 cups dried shiitake) and chicken feet for collagen. For beef-like richness, use a 50/50 mix of beef and chicken bones. The simmer time remains the same—just taste and adjust seasoning at the end.
Why does the recipe call for chicken feet if I'm vegetarian?
Chicken feet provide collagen and gelatin that create the soup's signature velvety texture. For a vegetarian version, replace them with 2 cups vegetable scraps (carrot peels, celery ends) and 1 cup agar-agar (1 tsp per cup of broth) to thicken. Simmer for 6-8 hours instead of 12+ to avoid bitterness.
How do I fix cloudy broth after simmering?
Cloudiness usually means impurities weren't skimmed or bones weren't cleaned properly. For immediate fixes, strain through a cheesecloth-lined sieve or freeze the broth, then remove the top 1/2 inch of fat (which traps particles) before reheating. To prevent it: pat bones completely dry before simmering and skim foam for the first 30 minutes.
Can I make this soup in an Instant Pot?
Yes, but with adjustments: Use the High Pressure setting for 2 hours (instead of simmering), then natural release for 30 minutes. Add mushrooms and soy sauce after pressure cooking and simmer on Low for 1 hour. The Instant Pot version won't develop as much gelatin, so add 1 tsp cornstarch slurry when reheating for thickness.