
Soups & Stews
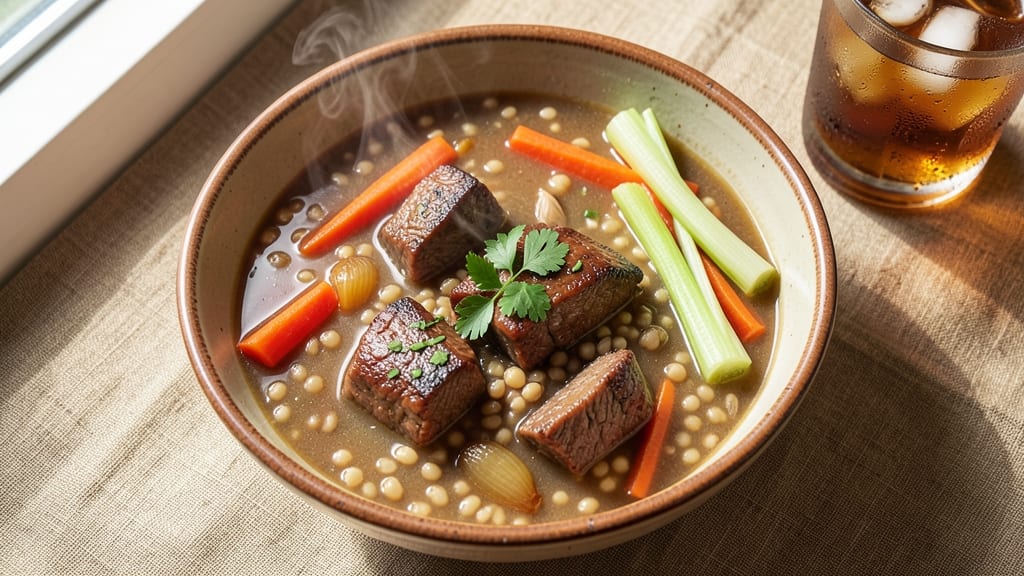
Creating Campbell’s-style beef and barley soup from scratch delivers a depth of flavor that canned versions simply can’t match—rich, hearty, and packed with slow-simmered goodness. This recipe transforms simple pantry staples into a comforting bowl of soup that’s perfect for chilly evenings or meal prep.
The key lies in proper simmering techniques and ingredient balance, ensuring every spoonful is tender, savory, and satisfying.
What sets this homemade version apart is the ability to customize it to your taste—whether you prefer a deeper caramelized base, extra-soft barley, or a touch of herbs for brightness.
Unlike canned soup, this method lets you control the texture and richness, resulting in a soup that’s restaurant-quality without the fuss. The slow simmer also enhances the beef’s tenderness, making it melt-in-your-mouth with every bite.
This recipe is designed for efficiency and flavor, using classic techniques like browning the beef and deglazing the pot to build layers of depth. The barley softens just enough to be hearty yet tender, while the vegetables retain their natural sweetness.
Whether you’re cooking for one or a crowd, the instructions are straightforward, ensuring a foolproof outcome every time.
The best part? This soup tastes even better the next day, making it ideal for meal prep or leftovers. Garnish with fresh parsley or a drizzle of cream for added richness, and you’ll have a dish that’s as nourishing as it is delicious.
Ready to make your own? Let’s get started with the ingredients and instructions.
Ingredients for campbell's beef and barley soup
Pantry staples and a few fresh touches create the perfect beef and barley soup.
| Ingredient | Amount | Notes |
|---|---|---|
| Chuck Roast 🥩 | 1 ½ lb | Cut into 1-inch cubes |
| Pearl Barley 🌾 | 1 cup | Uncooked, rinsed well |
| Yellow Onion 🧅 | 1 whole | Medium size, diced |
| Carrots 🥕 | 4 medium | Peeled, cut into chunks |
| Celery Stalks 🧅 | 3 whole | Trimmed, chopped |
| Garlic Cloves 🧄 | 4 cloves | Peeled, minced |
| Tomato Paste 🍅 | ½ cup | Squeeze tube preferred |
| Beef Broth 💧 | 6 cups | Low-sodium preferred |
| Red Wine 🍷 | ½ cup | Dry variety, optional |
| Bay Leaves 🌿 | 2 whole | Fresh preferred |
| Thyme Sprigs 🌿 | 2 whole | Fresh, not dried |
| Salt 🧂 | 1 ½ tsp | Diamond Crystal preferred |
| Black Peppercorns 🌶️ | 1 tsp | Freshly cracked |
| Worcestershire Sauce 💧 | 1 tbsp | For umami depth |
| Olive Oil 🫒 | 2 tbsp | Extra-virgin preferred |
The chuck roast is your flavor foundation. Look for well-marbled cuts at the butcher counter or pre-cut beef section—Costco or Whole Foods often have great options. Pearl barley needs rinsing to remove excess starch, which prevents gumminess. For the vegetables, organic carrots and celery have fewer blemishes, but conventional works fine. The tomato paste? Trader Joe's squeeze tubes are perfect—no waste, and they keep for months. Fresh thyme and bay leaves elevate the soup, but dried will work in a pinch (use half the amount).
No red wine? Substitute extra beef broth—just add 0.5 cup more. Fresh herbs not available? Dried thyme at one-third the amount gets you close. Pre-cut veggies save time, but whole carrots and celery stay fresher longer. The Worcestershire sauce adds depth—Lea & Perrins is the classic choice. For extra richness, stir in 2 tablespoons of tomato paste at the end. If you're making this ahead, the flavors deepen overnight, so don't skip the overnight refrigeration.
This soup reheats beautifully—simmer on the stove for 10 minutes before serving. Keeps for 5 days in the fridge or 3 months frozen. I always double the batch—one for dinner, one for lunches. Store in airtight containers with a layer of broth on top to preserve freshness. Garnish with fresh parsley or a drizzle of cream right before serving for that restaurant touch.
Why You'll Love This Recipe
- Foolproof Simplicity: I swear by this recipe because it’s the kind of meal that doesn’t demand perfection—just a big pot, a few chopped veggies, and patience. Toss in the chuck roast and barley, let it simmer, and boom—no fancy techniques needed. My kids think I’m some kind of soup chef, but honestly, it’s just dump-and-go with a side of love.
- Rich, Deep Flavor: That slow-cooked chuck roast? It practically melts into the broth, turning every spoonful into a hearty, savory bite. The barley soaks up all the goodness, while the carrots and celery add just enough sweetness and crunch to keep it interesting—not too heavy, not too bland. Here’s what sold me: the first time I made it, my husband asked for seconds before I even sat down.
- Meal Prep MVP: Between us, this soup is my secret weapon for busy weeks. Make a big batch on Sunday, and you’ve got lunch or dinner covered for days. I freeze portions too—just reheat, and it’s like it was made yesterday. (Yes, even on a Tuesday night when takeout feels like a chore.)
- Budget-Friendly Powerhouse: Chuck roast and barley stretch across multiple meals without breaking the bank. I’ve fed a crowd of six for under $20, and everyone leaves happy. Plus, the leftovers? Even better the next day—if there are any, because my family devours it faster than I can snap photos.
Step-by-step instructions for Campbell's beef and barley soup recipe
Here's how to transform simple pantry staples into a rich, slow-simmered soup with restaurant-quality depth.
Sear the Chuck Roast for Maximum Flavor
Heat the 2 tablespoons olive oil in a large Dutch oven over medium-high heat until shimmering. Add the 1.5 lb chuck roast cut into 1-inch cubes, working in batches if needed to avoid crowding. Let each piece develop a deep golden-brown crust—this Maillard reaction creates the soup's foundational flavor. It should take about 8-10 minutes total, with pieces searing for 2-3 minutes per side. Don't rush this step; patience here means richer flavor later.
Once all the beef is browned, remove it with a slotted spoon and set aside. You'll notice the bottom of the pot has a beautiful caramelized layer—this is pure flavor you don't want to miss. Here's the thing—if your pot gets too crowded, the temperature drops and you'll steam instead of sear. Work efficiently but don't sacrifice browning for speed.
Build the Aromatic Base with Vegetables
In the same Dutch oven, add the 1 whole yellow onion (diced), 4 medium carrots (cut into chunks), and 3 whole celery stalks (chopped). Cook for 5-6 minutes until the vegetables begin to soften and the onion becomes translucent. This is where the soup's sweet, savory foundation develops.
Add the 4 cloves garlic (minced) and cook for another 30 seconds until fragrant. Then stir in the 0.5 cup tomato paste, spreading it evenly across the bottom to create a thin, flavorful paste. Pour in the 0.5 cup red wine and scrape up all those delicious browned bits from the bottom with a wooden spoon—this deglazing step captures all the concentrated beef flavor you just created.
Simmer the Soup Until Barley is Tender
Return the seared beef to the pot. Add the 6 cups beef broth, 2 whole bay leaves, 2 whole thyme sprigs, 1.5 teaspoons salt, 1 teaspoon black peppercorns, and 1 tablespoon Worcestershire sauce. Bring everything to a gentle boil, then reduce heat to low and cover partially. Let it simmer for 1 hour 15 minutes, stirring occasionally.
After the initial hour, add the 1 cup pearl barley (rinsed well). The barley needs time to absorb the broth and develop its characteristic chewy texture. Here's the key—you want the barley to be tender but still have a slight bite. It should take about 45-60 minutes total simmering time from when you add the barley until it's perfectly al dente. Taste the broth occasionally and adjust seasoning if needed.
Finish with Perfect Texture and Depth
Once the barley is tender (it should be just slightly chewy), remove the bay leaves and thyme sprigs. Taste the soup and make any final adjustments to seasoning—this is where you can really refine the flavor. The soup should be rich, slightly sweet from the caramelized vegetables, with a deep umami note from the beef and Worcestershire sauce.
For the perfect finish, let the soup sit off the heat for 10 minutes before serving. This resting period allows flavors to meld and the barley to fully absorb the broth. Serve hot with crusty bread to soak up every last drop of that comforting, slow-simmered goodness. The result should be a soup where each spoonful delivers layers of flavor—the tender beef, chewy barley, and perfectly balanced broth.
Pro Tips For Making Campbell'S Beef And Barley Soup
- SEAR THE ROAST FIRST: That chuck roast needs a good crust before it goes into the pot. After slicing it into chunks, pat them dry with paper towels—seriously, dry is the word—and sear them in batches over medium-high heat for 2-3 minutes per side. The browning adds depth that just simmering won’t match, and it keeps the meat from turning mushy later.
- SOAK THE BARLEY: Pearl barley’s the star, but it’s also the sneaky time-sucker. Skip the 30-minute soak? Your soup’s gonna taste like cardboard. Toss it in cold water for at least 20 minutes while you prep the rest—yes, even if you’re impatient like me—then drain it before adding to the pot. This cuts cooking time by half and keeps it from turning to mush.
- DON’T CROWD THE POT: I learned this the hard way—dumping everything in at once just steams the veggies instead of caramelizing them. Start with onions, celery, and carrots in a single layer on the bottom of the pot, then let them cook uncovered for 5 minutes before adding liquid. This gives them time to soften and develop flavor without turning to soup immediately.
- USE BEEF BROTH, NOT WATER: Campbell’s recipe might call for water, but beef broth—even the cheap stuff—makes a real difference. It’s not about fancy ingredients; it’s about the salt and umami already in the broth. If you’re short on time, use a bouillon cube dissolved in water, but don’t skip this step. Your soup will taste like it’s actually worth the effort.
Pro cooking tips for great campbell's beef and barley soup
Sear Like a Pro
Your Dutch oven is your best friend for this recipe—it retains heat beautifully and allows for even browning. Use a 6-quart Dutch oven if you have one, as it gives you plenty of room to work without crowding.
The key to searing is medium-high heat—if your oil isn't shimmering after 2-3 minutes, it's not hot enough. I like to use a meat thermometer to check the internal temp of my beef cubes after searing—160°F is ideal for that perfect balance of tenderness and flavor. 🔥
Deglaze for Maximum Flavor
Don’t skip the deglazing step—this is where the magic happens. After removing the beef, add ½ cup red wine (or sub extra beef broth) and let it bubble for 2-3 minutes while scraping up those browned bits with a wooden spoon.
If you're using dry red wine, a Cabernet Sauvignon works best—its tannins add depth. For extra richness, add 1 tablespoon tomato paste here too, letting it caramelize slightly before adding the broth. This creates a complex, layered base that canned soup simply can’t match.
Simmer Control is Key
Low and slow is the name of the game—gentle simmer, not a rolling boil. If your soup starts to boil vigorously, reduce the heat immediately. I use a lid with a slight gap to allow steam to escape, which helps prevent the soup from becoming watery.
For extra insurance, I place a damp paper towel under the lid to trap moisture. The barley should take 45-60 minutes to tenderize, but if it's cooking too fast, lower the heat further. A thermometer is your best tool here—aim for 195-205°F internal temp for the beef.
Barley Texture Secrets
Pearl barley can be tricky—overcooking turns it mushy, but undercooking leaves it crunchy. The secret is rinsing it thoroughly before adding to remove excess starch. For perfect texture, add the barley after the initial 1 hour and 15 minutes of simmering, not at the start.
If you're short on time, soak the barley for 30 minutes before adding to the pot—this cuts cooking time by 15-20 minutes. For a gluten-free twist, substitute quinoa or millet in a 1:1 ratio, but reduce simmering time by 10 minutes since they cook faster.
Seasoning Adjustments
Taste as you go—this is where homemade soup shines over canned. After adding the barley, check the seasoning every 20 minutes. If the broth tastes flat, add a pinch of salt or a splash of Worcestershire sauce for umami.
For extra depth, stir in 1 teaspoon soy sauce or 1 crushed red pepper flake in the last 10 minutes of cooking. If your soup needs brightness, add a squeeze of lemon juice at the end. Remember, flavors deepen as the soup sits, so don’t over-season early—adjust gradually. 💡
Resting for Perfection
Never skip the 10-minute rest before serving—this lets the barley plump up and the broth thicken slightly. I like to transfer the soup to a pre-warmed serving bowl or slow cooker set to "keep warm" mode.
For serving, garnish with fresh parsley or a drizzle of heavy cream to elevate the dish. If you're meal prepping, let the soup cool completely before refrigerating—this prevents skin formation. Reheat gently on the stove over low heat to avoid breaking the barley. The result?
A restaurant-quality bowl every time. 🍲
Nutrition facts
Frequently asked questions
Can I make this soup in a slow cooker instead of a Dutch oven?
Yes! For a slow cooker version, brown the beef in a skillet first, then transfer everything to your slow cooker. Use the same ingredients but cook on low for 6-7 hours or high for 3-4 hours. The barley will absorb more liquid, so you may need to add ½ cup extra broth before serving. The slow cooker method is perfect for hands-off cooking and develops even deeper flavors over time.
What's the best way to store leftovers?
Store leftovers in an airtight container in the refrigerator for up to 5 days. For longer storage, freeze in portions for up to 3 months. To reheat, warm gently on the stove over low heat or in the microwave with a splash of water to prevent drying. Never microwave directly from frozen—thaw overnight first. The flavors actually improve after refrigeration!
Can I substitute regular barley for pearl barley?
No—regular barley (like pot barley) has a much longer cooking time (90+ minutes) and becomes mushy. Pearl barley is specifically chosen because it cooks in 45-60 minutes while maintaining a pleasant chewiness. For a quicker alternative, try quinoa or farro, but reduce cooking time by 10-15 minutes since they cook faster than pearl barley.
Why does my soup taste bland after cooking?
Bland soup usually means one of two things: under-seasoned broth or overcooked vegetables. First, check your salt—add ½ teaspoon at a time until it tastes rich. For depth, stir in 1 tablespoon Worcestershire sauce or 1 teaspoon soy sauce during the last 10 minutes of cooking. Also, remove vegetables when they're just tender—overcooking turns them mushy and dilutes flavor. A squeeze of lemon juice at the end brightens the whole dish!
How can I make this soup gluten-free?
Swap pearl barley for quinoa or millet in a 1:1 ratio, and use a certified gluten-free beef broth. For extra heartiness, add ½ cup cooked lentils along with the barley. Remember these alternatives cook faster—reduce simmering time by 10-15 minutes and check for doneness early. The texture will be slightly different but still delicious and satisfying!