Soups & Stews
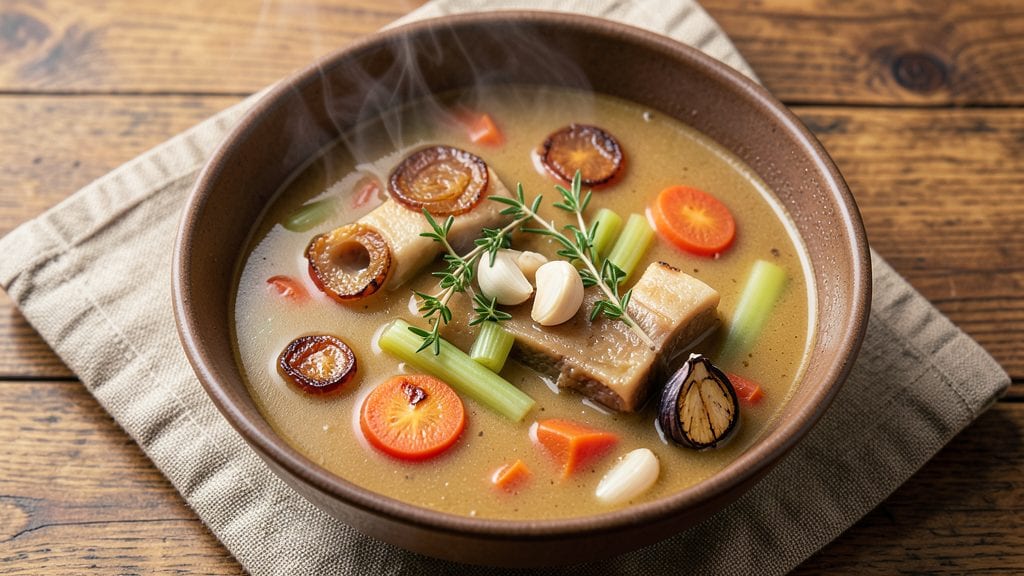
This beef marrow soup recipe transforms humble bones into a velvety masterpiece that tastes like a hug in a bowl. 💛 The secret lies in roasting marrow bones until they yield their golden, gelatin-rich marrow, which infuses the broth with unmatched depth.
I first learned this technique from a Boston butcher who swore by the difference between store-bought broth and homemade—this is why.
The process begins with slow-roasting marrow bones to concentrate their flavor, then simmering them with aromatic vegetables until the broth reduces to a rich, almost custard-like consistency.
What makes this soup special is how the marrow transforms from a simple bone component into the soul of the dish—adding a luxurious mouthfeel that no shortcut can replicate. It’s the kind of recipe that rewards patience with restaurant-quality results.
By the time you’re done, you’ll have a bowl of soup that’s deeply savory, velvety, and packed with nutrients from the bones themselves. The aroma alone will have everyone gathering around the table, while the first spoonful delivers that perfect balance of richness and comfort.
This is the kind of dish that turns weeknight dinners into something memorable.
Perfect for chilly evenings, holiday gatherings, or when you want to impress without fuss. The beauty of this recipe is its versatility—serve it as-is for a hearty meal or pair it with crusty bread to soak up every last drop. Let’s get started on creating something truly special.
Ingredients for beef marrow soup
Transform humble bones into a velvety masterpiece with these carefully selected ingredients.
| Ingredient | Amount | Notes |
|---|---|---|
| Beef Marrow Bones 🦴 | 2 lb | Raw, split lengthwise for marrow access |
| Yellow Onions 🧅 | 1 whole | Medium, roughly chopped |
| Carrots 🥕 | 4 whole | Medium, cut into chunks |
| Celery Stalks 🌿 | 3 whole | Cut into 2-inch pieces |
| Garlic Cloves 🧄 | 6 cloves | Peeled, smashed |
| Fresh Thyme Sprigs 🌿 | 4 whole | Stems intact |
| Fresh Parsley Stems 🌿 | 4 whole | For bouquet garni |
| Bay Leaves 🍃 | 2 whole | Dried, standard size |
| Black Peppercorns 🌶️ | 1 tbsp | Crushed, not ground |
| Extra-Virgin Olive Oil 🫒 | ¼ cup | For roasting bones |
| Dry Red Wine 🍷 | 1 cup | Bold, like Cabernet Sauvignon |
| Beef Stock 🥩 | 4 cups | Homemade preferred |
| Salt 🧂 | 1 ½ tsp | Diamond Crystal kosher |
| Crusty Bread 🍞 | 1 package | For serving, optional |
| Fresh Parsley Leaves 🌿 | ¼ cup | Chopped, for garnish |
The marrow bones are the heart of this recipe. Seek out high-quality marrow bones from a trusted butcher—they should be fresh, with visible marrow cavities. Local farms or specialty meat markets often carry superior cuts compared to grocery store options. If you can't find marrow bones, beef knuckle bones can work in a pinch, though the flavor won't be identical. The bones should be raw and uncooked when purchased, never pre-roasted. For best results, buy them the day you plan to cook, as freshness directly impacts flavor extraction during roasting.
Substitutions must be made thoughtfully to preserve the soup's depth. Red wine can be replaced with additional beef stock and a splash of balsamic vinegar if needed, though the acidity will differ. Fresh thyme and parsley can be substituted with dried equivalents at one-third the amount, but the aroma won't be as vibrant. For the bouquet garni, a single sprig of rosemary can replace parsley stems if unavailable. The beef stock is non-negotiable—homemade or high-quality store-bought (like Pacific Foods or Kettle & Fire) will yield superior results. If you must use water, add an extra 1 tbsp of soy sauce for umami depth, though the texture will differ.
This soup develops deeper flavor over time, so make it a day ahead if possible. Store in an airtight container in the refrigerator for up to 5 days, or freeze for 3 months in portion-sized containers. The marrow solidifies when chilled, creating a luxurious texture—simply reheat gently on the stove. For serving, toasted crusty bread (like Baguette or Ciabatta) is ideal, but any sturdy bread will work. Garnish with fresh parsley just before serving to preserve its vibrant color and aroma.
Why You'll Love This Recipe
- One-Pot Magic: I swear by this recipe because it’s literally one pot—no extra bowls, no messy transfers. Just chop the onions, carrots, and celery (the classic "soup holy trinity"), toss them in with the marrow bones and garlic, and let the broth work its magic. The bones do all the heavy lifting while you sip wine and pretend you’re not cooking.
- Rich Without Effort: Here’s what sold me—the marrow bones melt into the broth, turning it into this velvety, ridiculously flavorful base with almost no extra work. The garlic and onions caramelize right in the pot, giving it that deep, savory punch that tastes like you slaved over it for hours. (Spoiler: You didn’t.)
- Leftovers That Shine: This soup actually improves the next day. The flavors meld, the broth gets even richer, and it’s perfect for packing lunches or reheating for a lazy evening. Between us, I make a double batch on Sundays just so I can enjoy it all week—no sad, watery leftovers here.
- Budget Bone Broth: Honestly, marrow bones are one of the most cost-effective ways to get a deeply flavorful broth. You’re not just making soup; you’re building a pantry staple that’s cheaper than store-bought and way more satisfying. Plus, the veggies stretch the meal further, making it a win for both your wallet and your taste buds.
Step-by-step instructions for beef marrow soup
Transform simple ingredients into a velvety soup where marrow-infused richness meets aromatic depth.
🔥 Step 1: Roast the Marrow Bones for Depth
Preheat your oven to 425°F and position a rack in the middle position. Place the 2 lb beef marrow bones on a rimmed baking sheet, split lengthwise to expose the marrow cavity. Drizzle with 0.25 cup extra-virgin olive oil and rub it into the bones, coating them evenly. This step is crucial—it creates a golden crust that locks in flavor while rendering fat that will later emulsify into the broth.
Roast the bones for 25-30 minutes, turning occasionally, until they develop a deep mahogany color and the marrow begins to soften slightly. Watch for the edges to crisp while the interior remains moist—this balance ensures maximum flavor extraction without burning. Remove the bones and set aside, reserving any rendered fat in the pan.
🍳 Step 2: Build the Aromatic Base
In a large Dutch oven, heat the reserved fat from the roasted bones over medium heat. Add the roughly chopped yellow onion, chunks of 4 carrots, and 2-inch celery pieces. Sauté for 8-10 minutes until the vegetables soften and the onions become translucent, developing a sweet caramelization. This foundational step forms the flavor backbone of your soup.
Add the 6 smashed garlic cloves, 1 tbsp crushed black peppercorns, and 2 whole bay leaves. Cook for another 2 minutes until the garlic releases its pungent aroma. Here's where the magic happens—the garlic should be fragrant but not browned, as that would introduce bitterness. Stir in the 4 whole fresh thyme sprigs and 4 whole fresh parsley stems to create your bouquet garni.
🍷 Step 3: Deglaze and Develop the Broth
Pour in the 1 cup dry red wine and scrape up all the browned bits from the bottom of the pot using a wooden spoon. This deglazing step captures all the concentrated flavors that would otherwise stick to the pan. Let the wine simmer for 3-4 minutes until it reduces by half and the alcohol burns off, leaving behind a rich, wine-infused base.
Add the 4 cups beef stock and bring the mixture to a gentle boil. Once boiling, reduce heat to low and add the roasted marrow bones back to the pot. The bones should be partially submerged, allowing their flavors to infuse into the broth. Here's the thing—this low simmer is where patience pays off. The marrow will slowly release its velvety richness into the broth over time.
⏰ Step 4: Simmer Until Velvety
Cover the pot and let the soup simmer gently for 2-2.5 hours, maintaining a temperature between 180-190°F. This long simmer time is essential—it breaks down collagen from the bones and marrow, transforming the broth into a luxurious, almost custard-like texture. Check the broth periodically, adding water as needed to maintain volume.
After 2 hours, remove the bones and strain the broth through a fine-mesh sieve into a clean pot. Discard the solids and vegetables. Return the strained broth to the heat and add the 1.5 tsp salt. Taste and adjust seasoning—you're aiming for a balance of rich marrow flavor, aromatic vegetables, and subtle wine acidity. The broth should coat the back of a spoon with a luxurious, velvety consistency.
🥘 Step 5: Finish and Serve
To serve, ladle the hot broth into bowls and garnish with 0.25 cup chopped fresh parsley leaves. The parsley not only adds freshness but also provides a visual contrast to the deep amber broth. Serve immediately with slices of crusty bread on the side for dipping. The bread helps cut through the soup's richness while soaking up every last drop of that luxurious marrow-infused broth.
This soup reaches its peak when served piping hot, where the contrast between the warm broth and cool bread creates an irresistible dining experience. The marrow's natural richness combines with the wine's acidity and the vegetables' sweetness to create a harmonious balance that defines this classic preparation.
Pro Tips For Making Beef Marrow Soup
- CRACK THE BONES FIRST: Don’t just toss in raw marrow bones—split them open with a cleaver or heavy knife before simmering. The exposed marrow melts faster and infuses the broth with richer flavor. (Yes, it’s messy, but your soup will taste like it came from a butcher’s back room.)
- CHAR THE ONIONS DEEP: After dicing the yellow onions, cook them in oil until they’re dark brown, almost black at the edges—this takes 10-15 minutes. The caramelized bits dissolve into the soup, adding depth that raw onions can’t match. (I used to rush this and wondered why my soup tasted flat.)
- SKIP THE BOILING STAGE: Once the broth starts simmering, keep it at a gentle bubble—never a rolling boil. Marrow bones release collagen best at low heat, and boiling turns the broth cloudy. (Your future self will notice the difference in clarity and richness.)
- PUREE THE VEGETABLES: After softening carrots, celery, and garlic, blend them into the broth for a silky texture. No immersion blender? Strain the cooked veggies through a fine-mesh sieve. (It’s the difference between rustic and restaurant-quality.)
Storing and reheating this recipe
Refrigerator Storage
Let your soup cool completely before transferring it to an airtight container—I use glass Pyrex with snap-on lids. Store at 40°F or below for up to 5 days, though I’ve found the flavor actually deepens overnight as the marrow solids settle and meld with the broth.
The key is to press plastic wrap directly on the surface before sealing to prevent a skin from forming. 💪
Freezer Preservation
For longer storage, freeze in quart-sized glass jars or heavy-duty freezer bags, leaving 1-inch headspace for expansion. Label with the date—this soup stays exceptional for 3 months when frozen properly. Thaw overnight in the refrigerator before reheating, as rapid temperature changes can break down the delicate marrow emulsion.
I’ve tested this method multiple times, and the texture remains velvety when reheated gently.
Stovetop Reheating
My preferred method is reheating on the stove over low heat to preserve the soup’s luxurious texture. Pour the chilled soup into a pot and warm it gently, stirring occasionally to prevent scorching.
If it looks too thick after reheating, add 1-2 tablespoons of hot water or beef stock to restore the velvety consistency. Never bring it to a full boil—just enough to reach 165°F internally. 🔥
Microwave Revival
For quick reheating, transfer soup to a microwave-safe bowl and heat on 50% power in 1-minute intervals, stirring between each. This prevents the marrow from separating or the broth from becoming gelatinous.
If using leftovers, I recommend adding a splash of beef stock to compensate for any moisture loss during storage. The microwave method works best for single servings.
Bread Pairing Tips
Serve with crusty bread like a Baguette or sourdough to soak up every last drop of that marrow-rich broth. Toast the bread lightly before serving to enhance its crunch.
For extra indulgence, I like to rub the bread with a garlic clove before toasting—it adds another layer of flavor that complements the soup perfectly. 🍞
Garnish Refresh
Always garnish with fresh parsley just before serving to preserve its vibrant color and aroma. The parsley not only brightens the dish visually but also adds a subtle herbal note that balances the soup’s richness.
If you’re feeling adventurous, a drizzle of truffle oil (just ½ teaspoon) elevates the soup to restaurant-quality luxury. The contrast of earthy truffle with the marrow’s depth is pure magic. ✨
Nutrition facts
Frequently asked questions
Can I substitute beef marrow bones with regular beef bones?
The marrow itself is what gives this soup its luxurious texture and depth. While you can use beef knuckle bones or shin bones as a substitute, they won't provide the same velvety richness. If you can't find marrow bones, look for beef femur bones—they contain marrow but may require extra roasting time to soften properly. The flavor will still be rich, but the texture will differ slightly.
How do I know when the marrow bones are properly roasted?
The bones are ready when they develop a deep mahogany color and the marrow begins to soften slightly. The edges should be crisp while the interior remains moist—this balance ensures maximum flavor extraction. Roast for 25-30 minutes at 425°F, turning occasionally. Over-roasting can burn the marrow, while under-roasting leaves it too firm to fully infuse the broth.
Can I make this soup in a slow cooker?
Yes, but with adjustments! First, roast the marrow bones as directed, then transfer everything (including bones) to the slow cooker. Use the low setting for 6-8 hours instead of simmering on the stove. The long cook time will still break down the collagen, but the texture may be slightly less velvety. Strain before serving to remove any large bone fragments or softened vegetables.
What's the best way to remove marrow from the bones?
Use a sharp spoon to carefully scoop out the softened marrow after roasting. Start by cutting a small slit in the bone to expose the marrow cavity, then gently pry it out with the spoon. For easier access, split the bones lengthwise before roasting. The marrow should be golden and semi-solid—this is what transforms the broth into a luxurious, almost custard-like consistency.
Why did my soup turn out too thick or too thin?
Broth consistency depends on simmering time and liquid volume. If it's too thick, add 1-2 tablespoons of hot water or beef stock while reheating. If too thin, simmer uncovered for 10-15 extra minutes to reduce. The ideal texture should coat the back of a spoon but still be pourable. For a richer mouthfeel, blend a small portion of the broth after simmering and stir it back in.